In 2022, GMP Annex 1 was revised to reflect the changing landscape of technology, discoveries, best practices, and needs. At the time of publication, this is the first and only, but far from the last, regulatory body to make a large update in several years. We do expect to see similar guidelines from the FDA soon; however, they have not published any yet.
At this time, GMP Annex 1 remains an excellent resource for those designing or using a cleanroom. It outlines how to develop a cleanroom from a risk based approach centered on a Contamination Control Strategy (CCS) instead of designing a convenient cleanroom and later integrating contamination control.
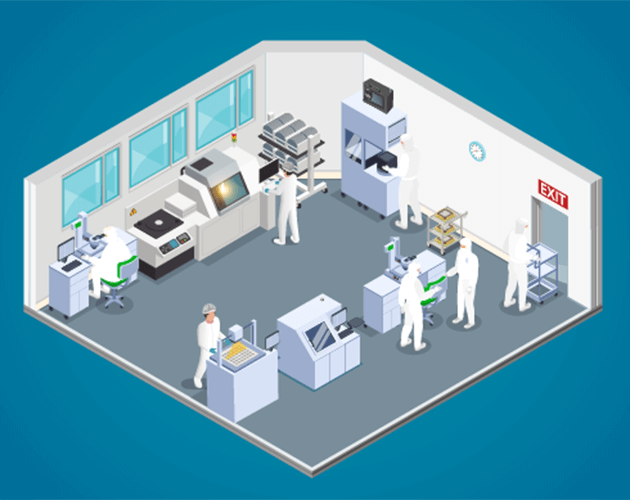
So let’s break down some cleanroom design basics incorporating the recent updates to GMP Annex 1.
Conduct A Risk Assessment
First and foremost, you need to conduct a risk assessment of your process and application. This risk assessment should cover:
- process inputs,
- final product,
- facility,
- equipment,
- specific processes,
- operations,
- historical monitoring data,
- qualification data,
- and other relevant information.
The goal of this risk assessment is to identify where your product is most susceptible to contamination, what contaminants are most dangerous, and where they are most likely to occur. GMP Annex 1 places an emphasis on relying on your most important resource: your personnel. Gather those who are most involved in your processes and glean from their collective knowledge to complete this risk assessment – and do not take any shortcuts. You should build your cleanroom around the information gathered here.
Write Your Contamination Control Strategy
Once you have your risk assessment, you should develop your Contamination Control Strategy (CCS). This is another very important aspect of GMP Annex 1. Instead of designing your cleanroom followed by your CCS, your CCS comes first. You should build around contamination control.
Your CCS and risk assessment dictate the strategy you take throughout the rest of your design according to GMP Annex 1.
Integrate Automation
As you move into truly designing your processes within your cleanroom, it is time to look at where you can automate. GMP Annex 1 places two levels of importance on automation: remove humans from cleanrooms in favor of automation wherever possible and automate computerized systems for data retention and collection.
First, humans are a major source of contamination in cleanrooms, so removing them whenever you can greatly mitigates the risk of contamination. Automation is safer and more reliable than humans.
Second, automation of computerized systems allows for predictable, repeatable processes and easily traceable data trails.
Thus, as you design your systems, look for places you can integrate automation.
Map Your Cleanroom
Next, you need to map your cleanroom. Not every area in your cleanroom will demand the same level of cleanliness or attention, so create a list of spaces that you will need and begin to think about the flow.
Critical Areas
You will first need to identify the critical areas of your cleanroom for aseptic manufacturing. These are the Grade A areas, according to GMP Annex 1. This is where the sterilized product, containers, or closures are exposed to any environmental conditions, such as during aseptic filling.
Grade A areas should be continuously monitored and are buffered by Grade B zones. (If you are more familiar with ISO classifications, the FDA recommends an ISO 5 or Class 100 designation).
Buffer Areas
Next, you have your buffer areas or Grade B zones. These are less crucial areas surrounding the critical zones designed to protect them and the product from the less restricted Grade C and D zones.
Grade B zones should also be continuously monitored and negative pressure. (The FDA recommends these zones are ISO 7 or Class 10,000).
Design Your Flow
Once you have your general map of zones following your process, you need to design the general flow of your cleanroom. There are a few key components of your cleanroom in constant movement: air, personnel, equipment, and product.
Your previous map should have lined out the general flow of your product, but let’s take a look at the other elements.
Air Flow
Your air flow is a very important part of your cleanroom strategy. There are two types of flow: laminar and turbulent. When air flow is turbulent, there is no predictable movement of particles through the air. Thus, we want to create laminar, or smooth, air flow throughout the cleanroom. This allows us to push the air through the air filtration system and control the flow of particles away from critical areas.
Most cleanrooms use a low-level return system combined with positive or negative pressure to control air flow. This means the air supply is along the ceiling and the returns are along the floor. This helps create laminar flow and can control temperature, too.
The air is cycled through a strategic use of filters, mainly ULPA and HEPA filters, before re-entering the room. This is perhaps the most important part of the design of your cleanroom. We recommend exploring the air filtration strategy documents we have in our free Knowledge Center for a more comprehensive look at designing an air filtration strategy.
Personnel and Equipment Flow
The next items that will consistently flow throughout your cleanroom are the personnel and equipment. Both of these can create particles as they move. Thus, track where they will be moving in your cleanroom and plan those spots as hot spots for potential contamination. Identify if there will be extra movement in critical areas and design ways to avoid contamination there.
Choose Materials Used
Whenever choosing any sort of material used in your cleanroom (or in items that enter your cleanroom), you need to consider the following:
- Is it porous?
- Is it difficult to clean or sanitize?
- Does it shed particles?
If the answer to any of the above is yes, then you need a different material. If it is going to be present in the cleanroom, it needs to be non-porous, easily cleaned and sanitized, and non-shedding.
Choose Your Environmental Monitoring System
Now you get to choose your Environmental Monitoring System (EMS). This system should:
- Meet all the criteria of your CCS.
- Make your life easier.
- Offer real-time monitoring.
- Be of high quality.
- Have self diagnostics.
- Provide multiple integration options.
The good news is that this is actually the easiest part, because all you have to do is bring your CCS, risk assessment, and application to our experts here at LWS and we’ll do the rest for you.